This guide covers how to use the Lightshow Customizer to create and edit Lightshow Programs. Click here to open this page in a new web browser.
Topics Covered:
- Accessing Lightshow Customizer
- Using the Customizer
i. Accessing Lightshow Customizer
The customizer is a tool that allows you to edit the flash pattern (or "Program") for your Lightshow. To access the customizer, select Lightshow from the header dropdown. Then click on one of the two options on the right: "Add Custom Program" and "Create Without Audio".
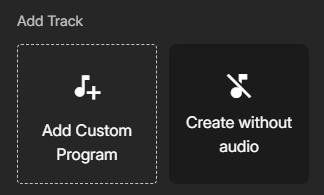
If you want to create a Custom Program WITHOUT using an audio file to sync to, click Create Without Audio. This takes you directly to the Lightshow Customizer where you can begin creating immediately.
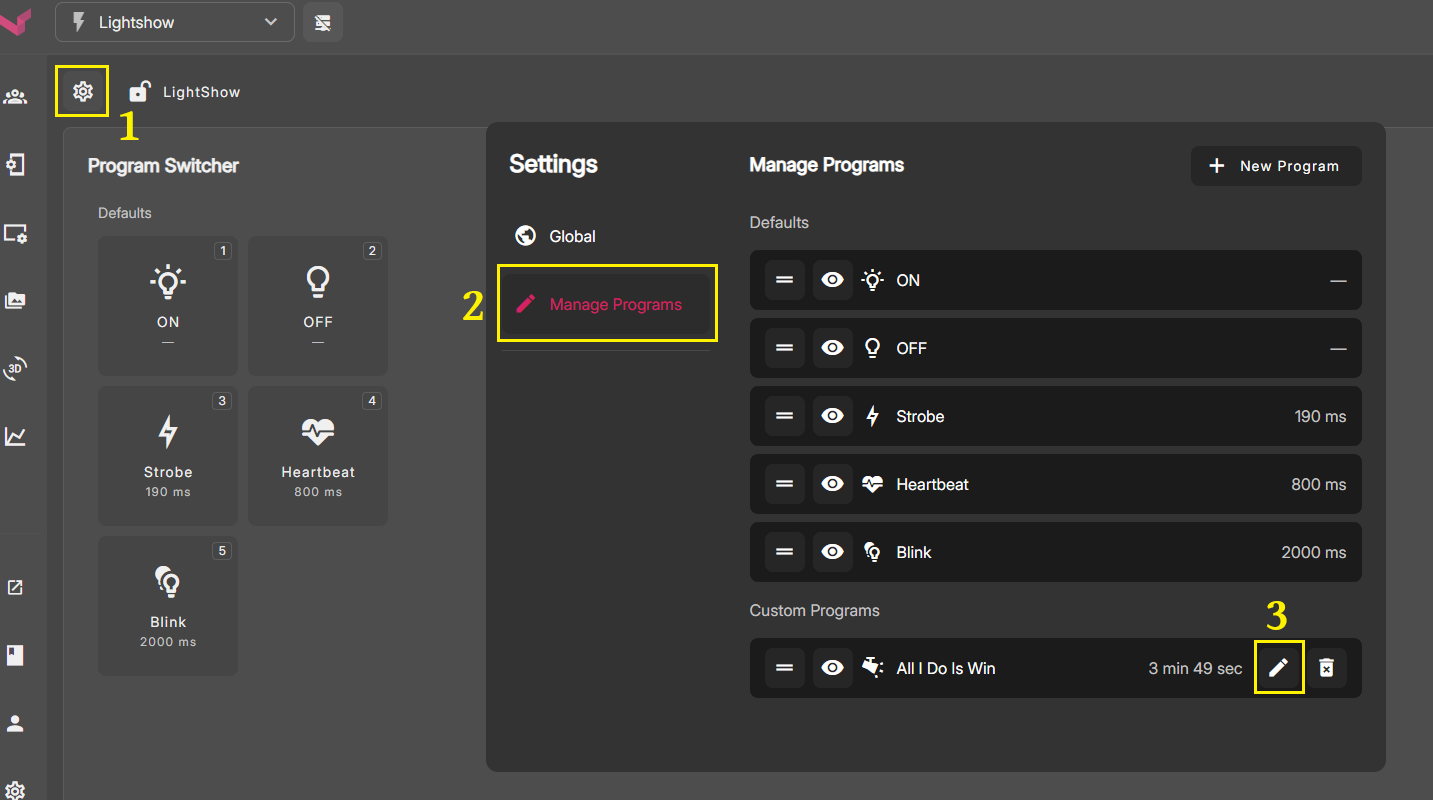
However the more common method would be to click "Add Custom Program" and upload an MP3 or MP4 audio file, to base your flash patterns on. Once you've added an audio file, you'll see that song appear in the Custom Programs section. To edit, click the gear in the top left corner. Then click Manage Programs, and click the pencil icon next to the audio file you want to edit. This takes you into the Lightshow Customizer where you can begin making edits.
ii. Using the Customizer
The editing flow can begin by first pressing Play on the timeline, and listening to the audio and see how it matches up to the flash preview in the bottom right corner.
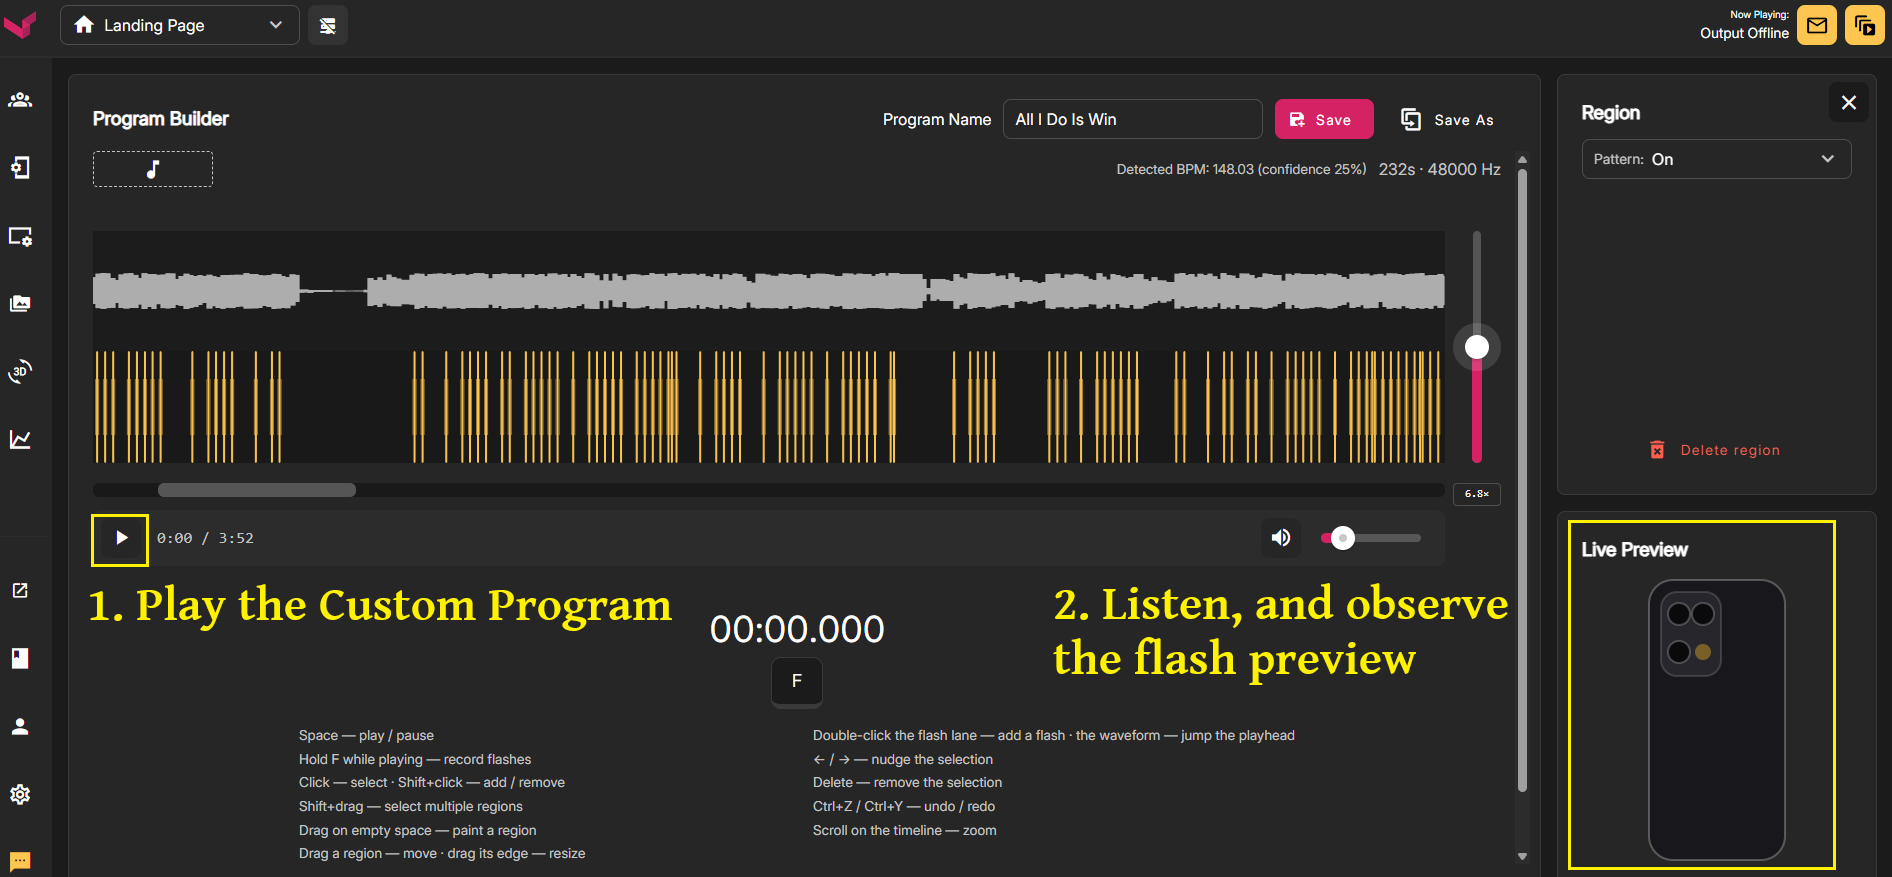
If you find that you'd like to change any of the flashes, you have many options. You can add, remove or resize any of the individual flashes (or "Regions"). Double click on the timeline to add a flash. Click, hold, and drag an existing flash to increase it's duration. To delete a flash, click on it and press the Delete key.
In addition to editing an existing Program, you can also clear all the flashes and start from scratch. This works great in combination with adding new flashes as the song is playing. To use this method, scroll down to the bottom and click "Clear all Flashes". Then Press Play on the timeline to begin the audio playback. While its playing back (with no flashes), you can tap the F key to add a flash. You can also hold the F key to keep the light on for more than a quick flash.
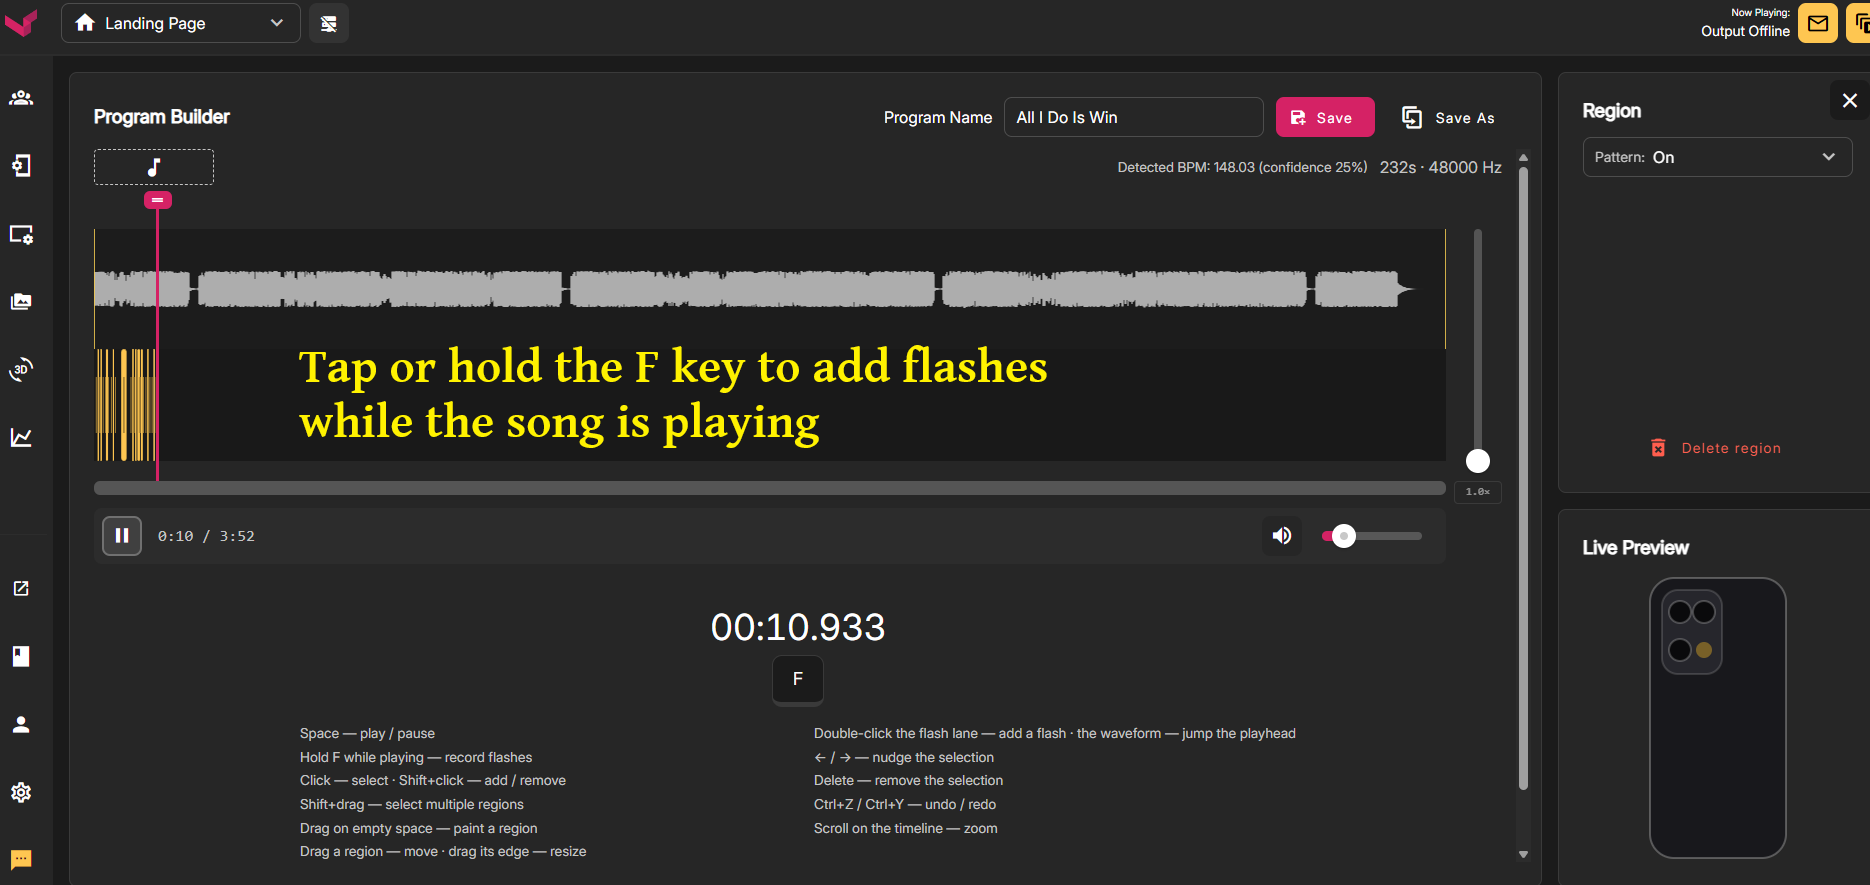
Play through your whole song while adding flashes with the F key. When finished, go back and tidy up any areas that need it, using the editing steps we reviewed earlier. Once your customization is complete, be sure to save! Or if you've changed your mind and don't want to keep your edits, simply close the Lightshow Customizer with the X button in the top right, and none of your changes will be kept. You can also save a new copy with a new name, instead of overwriting your previous version. Use "Save As" to create new and separate versions.

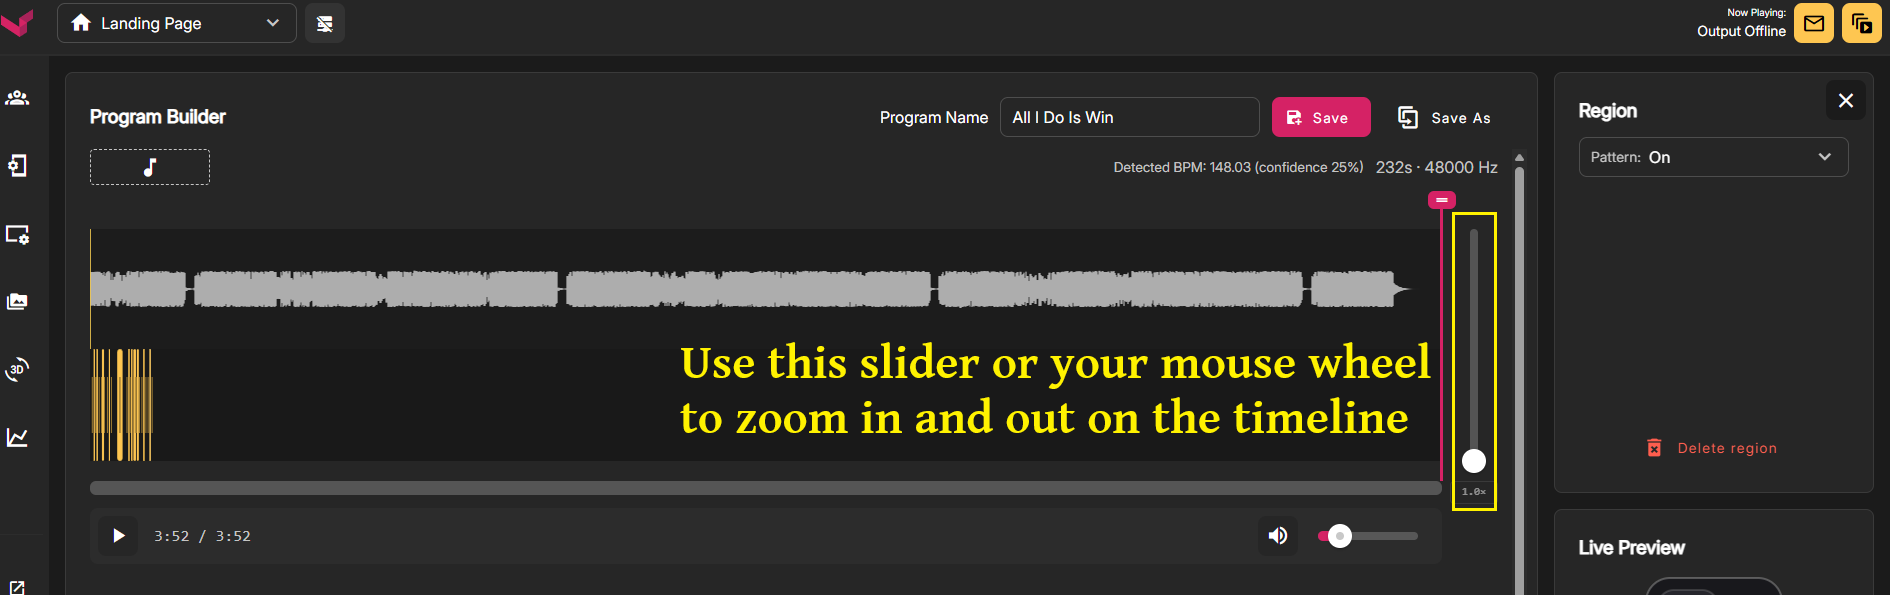
That concludes the general flow when using the Lightshow Customizer. Next we'll review some of the additional options you have. One is the zoom feature. Once your timeline gets long enough, you might need to use zoom so that you can differentiate the flash markers from each other. To zoom, either use the button on the slider or just use your mouse wheel.
Once you select a specific a specific flash/region, you'll see a dropdown with 4 options that you can use to further customize that specific Region. Note that when you use these features, they only get applied to the currently selected region - meaning only that individual flash is affected unless you hold shift and drag to highlight multiple regions at once. In that case, any settings you change will affect all highlighted regions.
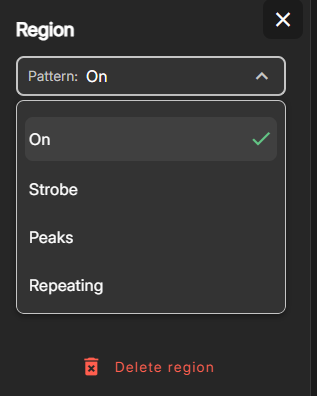
The first of the four options is the default setting, ON. If a region is using this setting, it will simply perform a quick default flash, just as you'd expect.
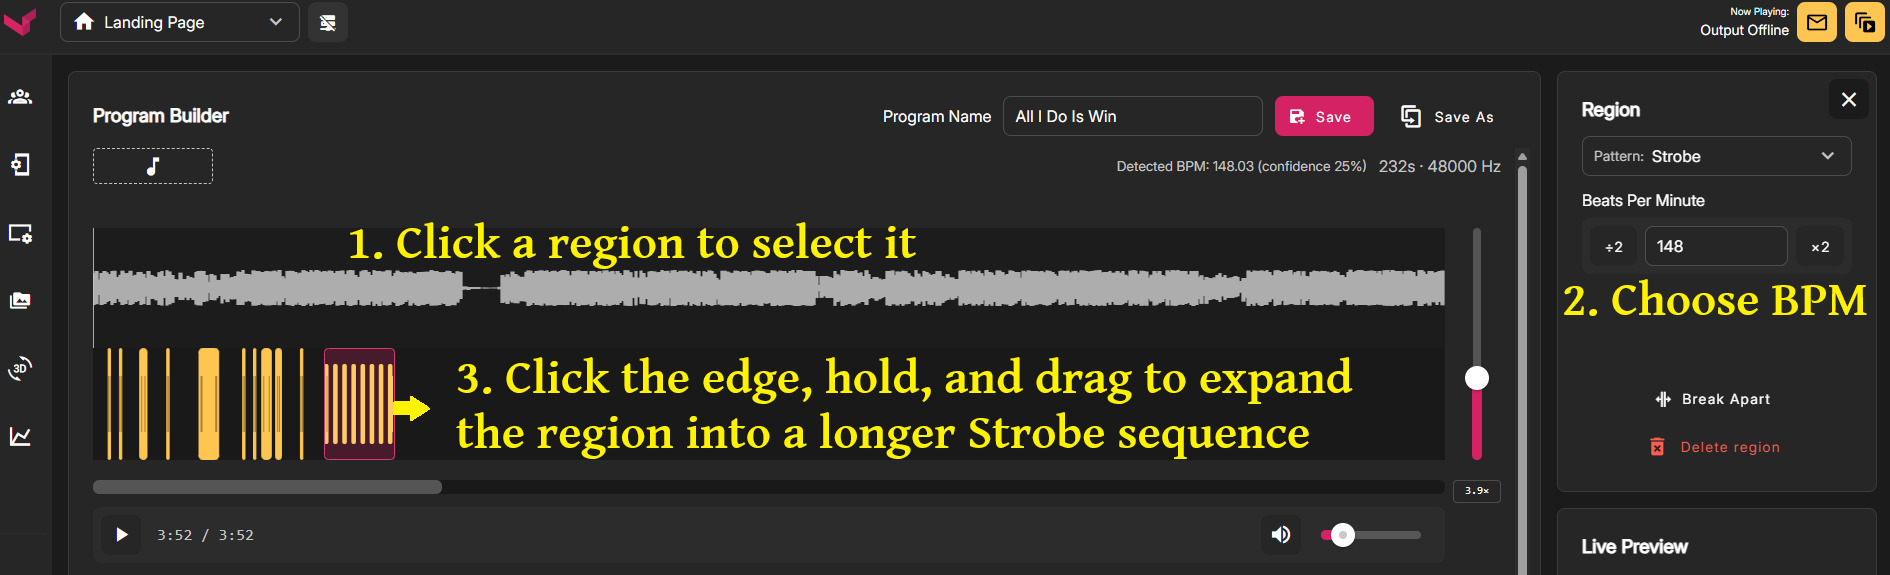
If you change the dropdown to "Strobe" for any particular region, that region on the timeline will produce a strobe effect instead of a single flash. You can click and drag the sides of the region to expand its duration, and have a longer section of strobe flashes. You can also set the beats per minute for the strobe section, to really sync it with the tempo of your song.
If you highlight one or more regions and select Peaks, this can change the sensitivity and can lower or raise the number of flashes. This option is best used when you aren't manually creating your own lightshow. This is more for adjusting the results of an auto-generated lightshow. For example, if I upload a song and I want to add additional flashes without doing it manually, I could manually lower the Peak threshold so that more flashes are generated in the system. If I want less flashes, I could highlight the entire timeline and then Raise the Peak threshold.
The final option is Repeating. If you highlight a region and select repeating, it will change that region from a single flash into a series of repeating flashes. This can only be seen if you then expand that region so there is enough room for multiple flashes. You can adjust how long the flash stays on, and how long it stays off - as well as adjusting the overall length of the Repeating section.
Once you're done editing, you can select Save or Save As to save it with a different name. This concludes the section on Lightshow Customizer. Please use the support chat for all additional questions. Thank you!
Was this article helpful?
That’s Great!
Thank you for your feedback
Sorry! We couldn't be helpful
Thank you for your feedback
Feedback sent
We appreciate your effort and will try to fix the article